

Let’s consider open mic performance as something more than a steppingstone to something bigger, as something more than a rite of passage.
Think about Open mic performance, at its best, as a form of artistic expression in the same…
Read more2026 Posts

Lil Rev
Extended interview
Condensed Interview
Bernadette Plazola interview
Casey MacGill
Extended interview
Condensed interview
Ray Cygrymus
Conrad Cayman
Bobby J Condensed Interview
Bobby J Extended Interview
Canote Brothers Interview
Get your songs ready for the Reno Ukulele Festival Open Mic!
How to prepare for the Reno Ukulele Festival Open Mic on the Public Stage!
There will be Open Mikers of different levels, from beginners to accomplished musicians. All are welcome! Never, ever compare yourself to another musician. We are at different spots on our paths to better musicianship. Wherever you are on your journey, everybody else has been at that same place at one time, so relax! Nothing accelerates your progress along the path more than participation in Open Mic.
This year, the Festival is emphasizing “Performance” by extending your Open Mic possibilities. There will be eight, that’s right, eight open mics, six of them expanded to offer as many as twelve slots per Open Mic. Seriously, brothers and sisters, this is a fantastic opportunity for you to grow, and if you are already “growed,” here is an opportunity to dazzle us with your songs.
Plan your performance(s). We say “performances,” plural because it is quite possible that you will have multiple opportunities to perform.
Open Mic #1 Wednesday 4:00-5:15 (expanded)
Open Mic #2 Thursday 11:30-12:45 (expanded)
Open Mic #3 Thursday 2:45-4:00 (expanded)
Open Mic #4 Thursday 4:30-5:30
Open Mic #5 Friday 11:30-12:45 (expanded)
Open Mic #6 Friday 1:00-2:00
Open Mic #7 Saturday 12:45-2:00 (expanded)
Open Mic #8 Saturday 2:00-3:15 (expanded)
Count ‘em up. More than ninety, that’s right, ninety, slots for you to pick from, and, yes, you may perform more than once.
Signups
We try to be as fair as possible at signup time, and also accommodate special needs—mobility issues, for example. There is no perfect way to do this. If you do have a special need, please get to Bobby J or one of the other hosts with your request before the official signup.
Arriving early is a good idea. Official signups are one half hour before the Open Mic—but fifteen minutes before the official signup, you may sort yourselves into a pre-signup line in the order that you arrive. We reserve the right to put “special needs folks” at the head of that line.
You must wear your Reno Ukulele Festival badge to sign up. No exceptions.
Time
You get five minutes per slot. If you go over your time, we will be forced to stop you, mid-song, if necessary. So awkward. The five minutes includes your mic check, the song, and any banter you may want to include. That gives the one-hour events ten performances, and the six expanded events twelve performances.
Have your instruments tuned before you come on stage. Mic checks will be quick. Your host will help you set up and introduce you. Then off you go into your song! Is it possible to do two songs? Of course, if they are both very short, but we recommend one solid song. Come to the plate, hit a home run, trot around the bases like Babe Ruth, and receive a hero’s welcome by your teammates when you step on home plate.
We reserve the right to extend your allotted five minutes as circumstances allow.
Gear
There will be three Shure SM58 microphones on stands, and three ¼ inch instrument cables. You will have a monitor speaker on stage with you. If you do not have a plug-in pickup on your instrument, you will use one of the microphones to amplify your instrument. No sweat.
Open Mic Classes
There will be four classes to support your Open Mic performances. Handouts will be provided in class. Each class will give you an opportunity to ask questions.
Open Mic Basic Training Wednesday 3:00-4:00 Level 1 Bobby J
Microphones, monitors, patter (banter), visual elements, pickups
Open Mic Diction Thursday 9:45-11:00 Level 2 Bobby J
The biggest mistake Open Mikers make. This topic is not what you think it is.
Open Mic Grad School Friday 9:45-11:00 Level 3 Bobby J
Secrets (and Bobby J ain’t tellin’)
When Things Go Wrong Saturday 10:45-12:00 All levels Conrad Cayman
Conrad promises humor. Sit back, and have a good time.
All levels are welcome at all classes.
Three final notes:
There will be a Strum-Along on the Public Stage on Thursday from 1:30 to 2:25.
We cancelled a final Saturday Open Mic so that all attendees at the festival could attend Perry Stauffer’s “Bluesy Jazz Jam,” an event not to be missed! Bring your ukulele. That’s 3:30-4:30 in Sierra 5.
Organic and spontaneous “Pajama Jams” will take place every night at 9pm on or near the Public Stage.
Open Mic Tips #8: Down at the Club
You may find friendly venues where people come to hear the music, where they sit facing you, where they don’t talk while you are playing, where they don’t get drunker as the evening progresses, where you get a lot of support from the audience and the other players.
Most open mics are not like that.
Most open mic venues are at restaurants, bars, coffee houses, pizza joints, and the like. People come to dine, celebrate birthdays and graduations, meet with friends, cry into their beer, sit at the bar and watch Monday Night Football (the Niners lost last night; I know this because I could see the wide screen TV from the stage where I was performing during the final minutes of the fourth quarter).
Why would anyone put themselves through this?
Because Club mics provide you with opportunities to sing and play in front of audiences.
Because this is how you accelerate your growth as a performer.
Because this is how you pay your dues.
Ringo says: “You gotta pay your dues if you wanna sing the blues, and you know it don’t come easy.”
Performing solo is not for everyone. Many ukulelists find their sweet spot in the safety of strum-alongs, the comfort of expertly run ukulele groups, marvelous classes with gentle teachers, the exquisite joys of playing beautiful music for its own sake, meeting with old friends, making new friends, learning songs. . . yes, that’s the ticket for many, many ukulele junkies.
Though there is much overlap, performance craft and pure musicianship are different animals. You can be an accomplished musician and a mediocre performer, or the reverse. It’s been said about me that, as a musician, I’m a pretty good “storyteller.” My son (my OWN SON!) says that I am a middle-of-the-road player and singer, but that I can hold down a stage with anybody. I’m happy with his analysis. It’s important as a player to know who you are, what you are, and to be honest and accurate with yourself. I take classes to become a better musician. I go down to The Club to become a better performer.
How do you find the Clubs? Start searching on the internet. You will be surprised at how many open mics are available in your area--unless you live out in the desert, a hundred miles from anywhere, or up on the tundra. I live between the small foothill towns of Grass Valley and Auburn, California, where, within a few minutes’ drive, there are three open mics on Monday and two each on Tuesday, Wednesday, and Thursday. And there are several more I have not even investigated.
Drift around between Clubs. Other players will point you to even more venues, and more, and more. These venues are all different, and they have their own rules:
Time limits for your set—5, or 10, or 15 minutes, or number of songs—1, or, 2, or, 3, or 4.
What time the sign-up sheet goes out.
Sound check protocols.
And the like.
More important than rules, the different venues have distinct “cultures.” Some are more casual; some more formal. Some progress from individual performances to late-night jams and collaborations. Some are well hosted; some are not. Some are well engineered; some not. Some have excellent audio gear; some are rinkydink.
Find a Club that fits you. Find a club where you are comfortable. If you are planning to dine, find a club with an affordable menu. Find a club where the level of performance and types of music are in your wheelhouse. I prefer clubs where I can hold my own, but where there are a few more accomplished players I can learn from. I prefer clubs where I can be successful with Country Western, or American Standards, or 70’s Pop, or LA Cool Rock, or singing the Blues. I don’t do “originals,” but that is a discussion--a controversial and heated discussion--for a future article.
For now, I’m going to leave you with a sketch of a hypothetical 3-song set that works “down at the Club.”
Open with a short song that is familiar to the audience. “Blue Bayou (key of C)” is as close to a sure-fire opener as I know. It has never failed me. “You Are So Beautiful (key of G),” the Joe Cocker version, is also a winner.
Change key, and put your difficult, or dicey, or most sophisticated, or most obscure, or original (if you must) song in the middle position, for example Leon Russell’s “A Song for You (key of D).
Change key, and windup with an upbeat, get-your-groove-on powerhouse. Recently, I’ve had success with Joe Cocker’s version of “Unchain My Heart (key of Am).
And then, and then, always, always have a hot encore song ready to go. If your set has engaged the audience, if your final song was a home run, if the stars align, if you have been very, very good in a previous lifetime, you may get shouts of “Encore, Encore!” from the audience. This is a great gift, Grace itself. If given to you, do not spurn the opportunity to play an encore.
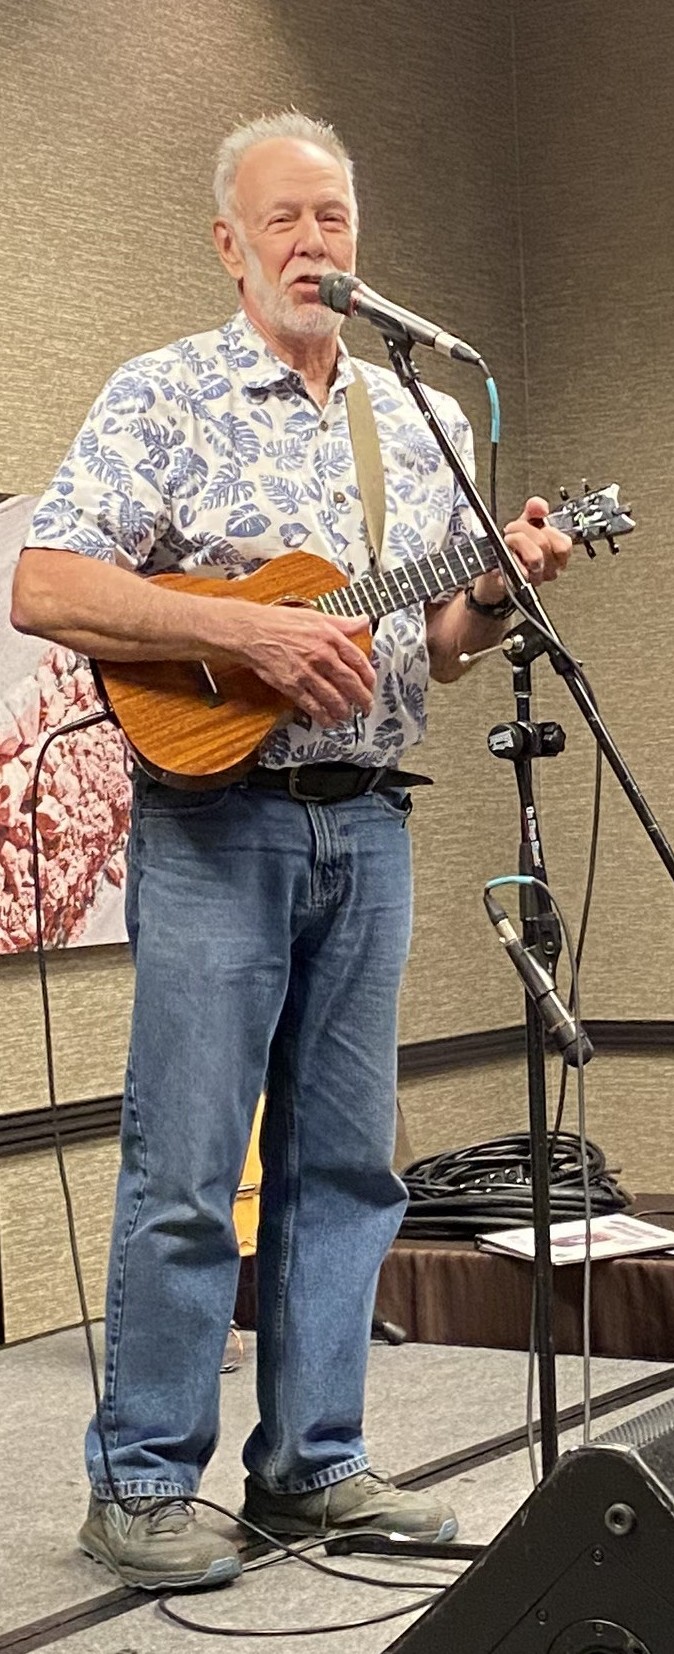
Below is a photo from the “friendly” open mic stage at the Reno Ukulele Festival.

Open Mic Tips #7: Let's Go Shopping
If you perform in a variety of venues, you’re going to be singing into a microphone and playing your instrument through mixer/amplifier/speaker(s)—or, if you’re lucky, the venue will have something like a bluegrass mic that will pick up your acoustic instrument just dandy, like, for instance, the upcoming Reno Ukulele Festival in October, so relax if you are a stout member of the acoustic tribe.
We’ve already discussed microphones in Open Mic Tips #3, so I’m not going to rehash that topic except to say eventually you gotta have a mic and you gotta know how to use it. Likewise, your ukulele is not loud enough to be heard down at the Club without a pickup. You might get away with no pickup from time to time, (like in an emergency, for instance there’s a glitch in the mixer, or your pickup fails, or somebody (you probably) forgot to change the pre-amp battery, but we’re not here to “get away” with anything. We’re here to make beautiful music, right? For that, you need to process and amplify your ukulele sound for fidelity, EQ , reverb, and other arcane mysteries of high-quality audio engineering.
(Let me pause for a moment to remind you that we’re talking about live performance, not studio recording. Live, wild, open mic performance.)
(Reno Producer note: You do not need to have a pickup in order to play at the Open Mic Public Stage at the festival this year. We will have a bluegrass-style mic you can stand in front of which will amplify your sound.)
To get the most out of your open mic experience, you need to practice at home with amplification and audio processing. What do you need to buy, at minimum, to get started? Here are my recommendations along with approximate prices as ordered through Amazon and/or Sweetwater as of today, August 22, 2025.
Total expenditure for home practice. About 600. (Surely an adroit shopper such as yourself can find cheaper deals; just remember, you get what you pay for.)
Notice that I didn’t include the pickup for your ukulele. This is a complex Pandora Box discussion I’m not going to open in this article. Get a decent pickup that is recommended and installed by your luthier or buy an instrument with the pickup already installed. Do you want to know what I use on my Romero Grand Tenor? Maybe not, but I’ll tell you anyway. I use a MiSi (my-sigh? Mee-see?) active, battery-free, under saddle pickup. About $200 uninstalled, about $300 installed.
Got some money left? Let’s upgrade! Hot diggety!
Get yourself a mixer. I use an Allen and Heath ZEDi-10 channel mixer. With it, you can balance and shape your sound for both microphone and ukulele, make it the centerpiece of a backyard concert, or invite your friends over for a studio jam. $300-$400.
To go with that mixer, invest in a pair of 12” powered speakers with stands. $600-$800.
Gonna put on your own show? Buy at least one 10” powered monitor speaker so you can hear what the heck you’re doing. $150-$200.
Buy more ¼” instrument cables, more XLR microphone cables. $200. Get 30’ lengths (at the least)
Add a couple more mics and mic stands to your shopping basket. $300.
Total expenditure for upgrades. $1500-$1800.
Let me conclude with five benefits of working with amplified sound.

Open Mic Tips #6: Learning the SOng
I’ll not presume to suggest which songs you should learn. Okay, that’s not true; in another article called developing your “set,” I’ll get up on that soap box, but for now let’s pretend that you have a song in mind, a song that attracts you, a song that has meaning for you, a song that you’ve always wanted to play, a song that you just heard that rearranged your inner world, a song that you think will “go over” at the Monday night open mic down at the Brewery, a song that is cool, a song that is hot. That song.
Let’s get something straight: I’m not talking about the song you wrote yourself (the “original” song)
which is a different topic altogether. And let’s clarify another type of song I’m not talking about; call it a
“tribute” cover song, the kind of song you play note-for-note exactly the way some other musician plays
it. I have no idea how to copy somebody else’s work, and even less interest in doing so.
We’re talking about songs that somebody else wrote. Sometimes that song is performed by the
musician who wrote it but not often. Yes, we’re in the Golden Age of the Singer-songwriter, but it wasn’t
always that way, and in fact, until recently, most songs were written by professional songwriters and
then sold for performance to somebody else. Patsy Cline, for example, didn’t write her big hits, but the
chance is good that you know “If You Got Leavin’ On Your Mind” from Patsy’s “cover” of the song
written by a minor Canadian songwriter named Joyce Smith, a song which flopped until Cline bought it
and turned it into a big deal. So, whose song is it? And my answer is . . . make it your song.
That’s what I suggest you do. Begin with the original lyrics and music and. From that foundation,
develop your own version. Again, I’m not talking about songs you write for yourself, and if that’s your
goal, you should consider taking classes from a terrific songwriter teacher, Victoria Vox comes to mind,
and not me. I don’t know diddly squat about writing songs. I do, however, write children’s books and
post-apocalyptic science fiction novels. Check me out on Amazon. Yes, that was a shameless, self-
promoting plug for which I apologize, but not too much.
Where was I? Oh yes, developing your own version of a song from the lyrics and the music as first
brought into the world by a professional writer. That’s the ticket.
You probably know the song from performances of it by well-known musicians. Listen to different
versions by different musicians, and even different versions by the same musician.
Quirk Alert. Once I have decided on a particular musician’s version, I develop my version in the same
key. We can argue this quirk until the cows come home, but it feels respectful to learn the song in the
same key as the artist I’m learning it from, and if you are lucky enough to perform it with other
musicians, there’s a good chance they will also know it in that key. So, if the original key is A flat, and A
flat scares the heck out of you . . . good. Here’s your chance to learn how to play in the key of A flat.
Huzzah!
Find or build a chart for the song that contains, at minimum, the lyrics and chords. I can read tabs, more
or less, but not conventional notation, so finding “sheet music” for the song is of no use to me. If you
read music, that’s great news for you. You got a head start on the rest of us. For my approach, lyrics,
chords, and occasional tabs (mostly for intros, outros, turn-arounds, and interlude solos) does the trick
and doesn’t lock me into the subconscious need to reproduce some other musician’s version, that note-
for-note thing we talked about earlier.
Chart in hand, sing and play the song along with the artist you are learning from. I recommend you
become a premium member of Chordify which you can find easily online. Chart in hand, practice with
Chordify or some other online platform, and there are many. Find one (or more) you like, and practice,
practice, practice. It’s fun. I’m not yanking your chain. Fun.
At this point, you are probably still relying on your chart, but you can hack your way through the song.
Put the chart into a section of your song book called “new songs.” You do have a song book, don’t you?
Time for the next step. Abandon your computer and head over to your special music nook, space, place,
studio, whatever. You do have a special music place, don’t you?
Settle in, re-tune, and say, “Alexa, play If You Got Leaving on Your Mind by Patsy Cline, volume ten.”
And Alexa, she say, “Sure, If You Got Leaving on Your Mind by Patsy Cline, remastered 2002.”
Play and sing the song with Patsy. Over and over and over, spending less and less time looking at your
chart.
Now comes the watershed moment when you ask yourself, is this new song worth pursuing? Is it right
for my voice? Is it right for the ukulele? Do I still love it? At this point, I ask my main respondents to
listen and give me the encouragement to keep going with the song or abandon it to the slush pile.
Christine, my real wife, might say “it’s not worth the effort, it makes your voice sound reedy and the uke
sound thin and plinky.” Charlene, my trail wife (we’re both trail runners), might say, “it’s cheesy,” her
favorite barb. Cheesy. Ugh. Ouch. They are usually right, but often one of them will say, “I like it,” and
then I am encouraged to promote the song to the next section of my song book, a phase I call
Development.
Development. It’s time to experiment, to play around with different strum patterns, different finger
styles, different vocal approaches. It’s time to attend to the story of the song and to make sure you are
telling that story clearly. It’s time to work on the character of the person who is telling the story of the
song. It’s time to plan the performance of the song. It’s time to work on your diction, and dear, dear
people, diction is so important that I will address that crucial element in an article focused on that one
topic.
Let me wax mystical for just a moment. During the development phase, you will sometimes stumble
upon the magic of the song, of the music, of your performance. There you are, working so diligently,
and suddenly, the magic happens. The song is singing you. Something unexpected and beautiful is
enveloping you. Yeah, yeah, yeah, you are making it all happen, all by yourself. Or are you? Maybe you
have evoked the art of it. Maybe you have conjured up the soul of the song. Wow. What a buzz.
You think, for sure, that the song is a keeper and worthy of inclusion in your repertoire. Not so fast.
Hold your horses. You need to refine your own arrangement of the song. Another big topic worth its
own article, but here’s a brief sketch: refine your introductory patter, the selection and order of verses
and choruses, instrumental intros, outros, turn-arounds, interludes, vocal variety, surprises. That stuff.
Finally, you need to get “off book.” You need to put the chart away. You need to practice without chart
until you are solid. Not necessarily perfect, for perfection is the province of the gods, is it not? But solid
enough that you are not terrified of forgetting what you are doing while standing at the microphone in front of strangers. You know your song so well that if you get in trouble, you can get out of it. If you take a little flight of fancy during performance, you can find your way back to the main line.
Congratulations. You have chosen the song that’s right for you, learned it, developed your unique
version, practiced it, arranged it, memorized it, practiced it some more. Ready for your last run-thru
before packing up for the open mic? Stand in the middle of the room, or sit if you plan to sit during
performance, with your chair or stool in place. No music stand. No chart. Just you and your instrument
and the mic. You do have a mic, don’t you? Uke tuned, amp and speakers on. Deep breath. Relax.
Begin with your refined patter, if your going to use patter in the actual performance, and do your thing,
just like you’re going to do it down at the club. No false starts, no stops Sing your beautiful song. Make your beautiful music.
